

Intro
In this next tutorial, we are going to discuss variables and their use in Unity. If you have not completed the intro , be sure to check it out before starting this tutorial.
Variables
Variables are an essential programming concept. A variable is a structure capable of holding a value and that value can be changed at any time. If you compare them to the variables found in algebra, they are very similar except that they can hold more than just numerical data. the types of data that they can hold are considered data types. The main types that you will use in Unity are:
- float – used to store fractional numbers that are around 6 to 7 decimal places
- int – used to store whole numbers that range from ~ -2 billion to 2 billion
- bool – used to store true or false, 1 for true, and 0 for false
- char – used to store a single character or letter
- string – used to store a sequence of characters
Many other variables can and will be used, some for performance increases and others out of necessity, but these are the ones that we will focus on for now.
Creating Variables
Open the Learning.cs script created in the previous lesson. In order to create a class variable, we will need to place the variable within the curly brackets ( { } ) that are under the line:
public class Learning : Monobehaviour
By placing variables between these brackets, we are stating that the variables that we are about to create belong to this class.

Above the Start method, we are going to create a few variables. We will start with a string. A string is what we use to hold words and sentences. Above the Start method type:
// The characters name
string name = “Charlie”;

There are a few things we need to discuss about what we just wrote. The line that begins with // is a comment. A comment is a note that we can leave ourselves that does not get compiled (it is not considered runnable code). As such, we are able to leave notes about anything we code so that we are able to remember what sections of our code do if we leave that section and return later. You can see this above the Start and Update methods, these are comments that the Unity developers left to help guide us to how those methods are used (more on methods in a later tutorial). The comment we wrote is stating that the string variable that we have created is used for a character’s name. The next line shows:
string characterName = “Charlie”;
We will break this line done piece by piece. The string keyword is used to tell the compiler (the software that translates our code to be used within the game) that the variable will be a string data type. You must always declare that data type of the variable you are creating before giving the variable a name. The characterName section is the name of the variable we are creating. It is a good idea to give your variables meaningful names to help you better understand what the variables are in other sections of your code. There are a few rules that must be followed when naming a variable in order for your code to compile correctly:
- Variable names can only use characters, numbers, or underscores. NO SPACES: a_name or aName.
- A variable name cannot start with a number: name3 not 3Name.
- Variables are case sensitive and using the same names with different upper and lower cases creates different variables: aName is a different variable then aname.
You may have noticed that in the variable name characterName, the word Name is capitalized. This is an example of camel case. In camel case, the first word in the name is lower case and each word after has its first letter capitalized. This is a standard naming convention for local variables. We will discuss other naming conventions when we discuss access modifiers in a later tutorial.
The next section is the = which means the variable name we have created will store the value that comes after the =. Finally, the section “Charlie” is the value that we would like our variable characterName to store. “Charlie” is a string and as such must have double quotes around it to make it a string. Other examples of strings could be: ” “, “This is a string”, and “There are 3 strings”.
Showing Our Variable
In order to see our variable in action, we must add some more code. Within the Start method’s curly brackets, add the code:
Debug.Log(characterName);

Debug.Log is a method that allows us to print anything that is within its () into the Unity console. It is very useful in helping with finding issues with our code (Debugging) but for now, we just want to see something show on the scene. After you have added this code to the Start method, you can click back to Unity. We will need to add a GameObject to our Scene in order to see the code we just wrote. A GameObject is the base object in Unity that represents all in-game items including characters, props, UI elements, etc. To create a GameObject, right-click in the Hierarchy (this section is where all objects in are current scene can be located) and select Create Empty.

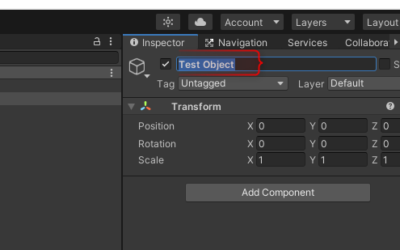
You will see a new item in the Hierarchy labeled GameObject which is the empty game object that we just created. Click on the GameObject in the Hierarchy and you will see the Inspector populate with new data. The Inspector contains data relevant to the selected game object. Near the top of the Inspector with the new game object clicked, you will see the name of the game object. Change that name to Test Object and then press enter/return on your keyboard.

We can then click the Add Component button in the Inspector which will open a drop-down menu. In the drop-down menu’s search bar, type Learning which should then show the script we created. Click on our learning script in the drop-down menu and it will be added to our game object.

We have now prepared our scene for use to test the code that we have written. Click the play button located at the top of the screen.

It will allow you to test your game, which currently doesn’t do much. You will notice, if your code is correct, that in the Console there is an entry that shows the word, Charlie. If you remember, Charlie was the value that we set our variable to earlier.

Conclusion
You now have seen how to create variables and print them to the debugging console in Unity. In part 2 of this tutorial, we will look into numerical data variables and complete math using code.


0 Comments
Trackbacks/Pingbacks